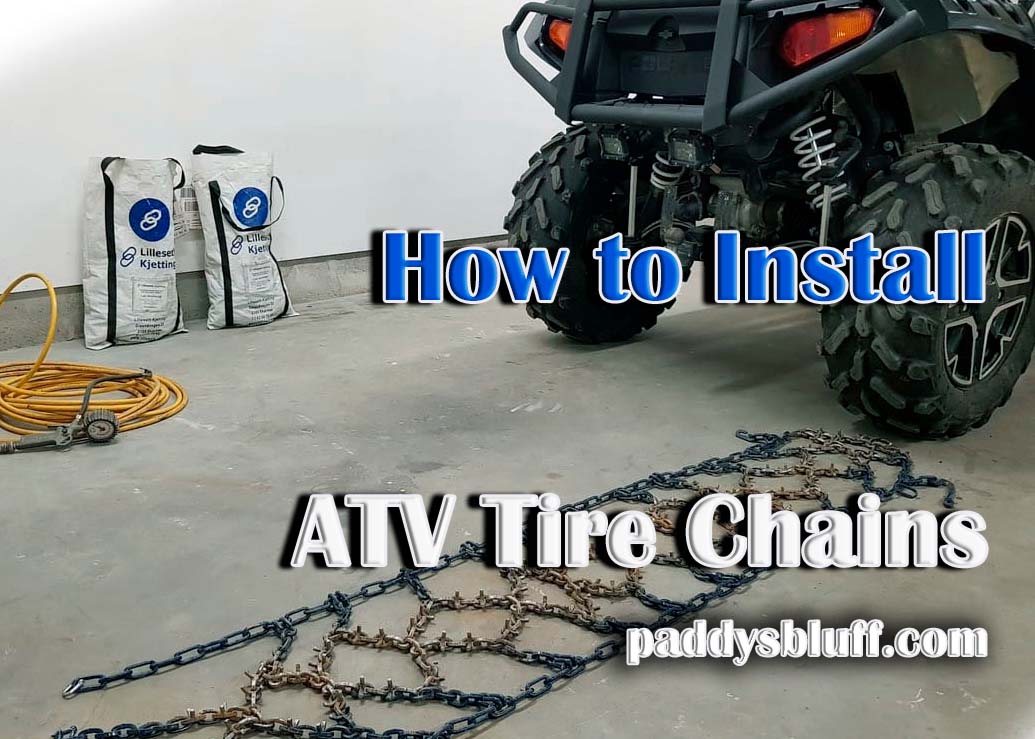
How to Install ATV Tire Chains
Snow, ice, and mud create a lot of problems for a regular set of tires. Folks that live in cold areas know very well how hard it is to steer a vehicle on a slippery road. The good news is – if you equip your four-wheeler with snow/tire chains, they’ll greatly improve traction and make you feel in control over the road. These are available at a fair price and serve for many years.
However, for an amateur driver with little to no experience in installing aftermarket gear/accessories, the installation process can be pretty tricky. But don’t worry, because after you’re through with this detailed guide, you’ll master the art of adding tire chains to your machine. So, if you’re ready for it, let’s get started!
#1: Getting Ready
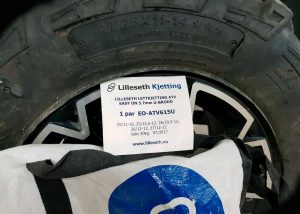
For the snow chains to fit, you’ll need to know the exact size of your tires. This won’t be hard to do: look for it on the side of the wheels. What’s more important is to make sure you’ve got enough clearance. If there isn’t enough space in the wells for the chains to fit, you simply won’t be able to do a proper installation. With the chains being too tight in the wells, they can damage the suspension system, brakes, and even exhaust.
If that’s the case, I recommend installing a set of spacers. They are available for cheap but will provide the necessary clearance. Spacer bolts will cost even less, but they won’t be as strong or reliable. And here’s a list of tools that you’ll need for the job:
- A tire deflator
- An air compressor
- A wrench or pliers (for tightening)
#2: Park the ATV
Before you move on to the installation, the ATV needs to be parked on a smooth, even surface. To add the tire chains, the vehicle will have to be slowly pushed forward and backward. That’s why the ground has to be as flat as possible. I always do it in my garage, as the floor there is perfect for this. Switch the four-wheeler to neutral and make sure the parking brake is on.
#3: Deflation
The next step is tire deflation. This way, it will be much easier to install the chains and to ensure a tight fit. Most experts recommend dropping 2-4 PSI (pounds per square inch). You could even try taking all the air out of the tires – sometimes, that helps with the installation. The best equipment for this is a tire deflator. A simple valve tool will also do.
#4: Install the Tire Chains
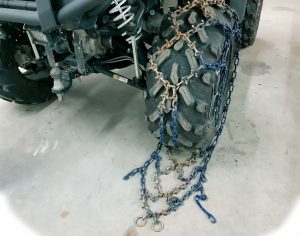
Ok, now it’s time to get to business! Grab the tire chains, and put them gently on the ground. The studs need to be facing up for this to work. A quick note: for the front tires, put the chains in front of each tire, but with the rear wheels, the chains need to be laid out behind them. The idea here is to slowly move the vehicle so that the tires are “sitting” right in the middle of the chains. For the front tires, you push forward; for the rear wheels, you go slightly back.
Do one tire at a time – it will be quicker and easier. So, just wrap the chain around the tire. Get it as tight as you can, but don’t overdo it. Locate the hook: every tire chain has one. Use it to connect the left side of the chain with the right one. The cam lock comes next. Again, it needs to be really tight. Get it as close to the other side of the snow chain as possible. Put it through the link and lock it up, like it was a real lock on your door or something like that.
#5: Pump the Tires back up
Alright, we’re almost there! All that’s left to do is pump the air back into the tires. The air compressor will help you with that. I would also recommend using a pressure gauge. It can monitor the pressure level, allowing you to deflate the tires properly. Most air compressors come with built-in gauges, by the way. As the air is filling up the tires, the chains will start to tighten up, getting really snug.
It’s a common mistake to tighten the chains way too much during the installation. If you do that, they’ll become overly tight when the air compressor starts pumping. Too much inflation can actually be pretty dangerous and break the chains or even damage the tires (making them literally explode). Here’s what you should do: keep your eyes on the pressure gauge, and if the snow chains are getting tight at 75%, turn the compressor off.
Use the inflator to deflate the tires, and try again. I usually loosen the chains by one-two links on both sides before pumping air back in.
#6: Take the Vehicle for a Spin
That’s it! To make sure everything is working the way it should, do a test run with the new chains. Start slowly and do some turns. Remember: chains don’t like high speeds. We do the test drive to let the chains create a “bond” with the tires and sit where they belong. So, ten minutes of slow driving should do the trick.